A default authentication page works, but it rarely gives a modern website the polished first impression it deserves.
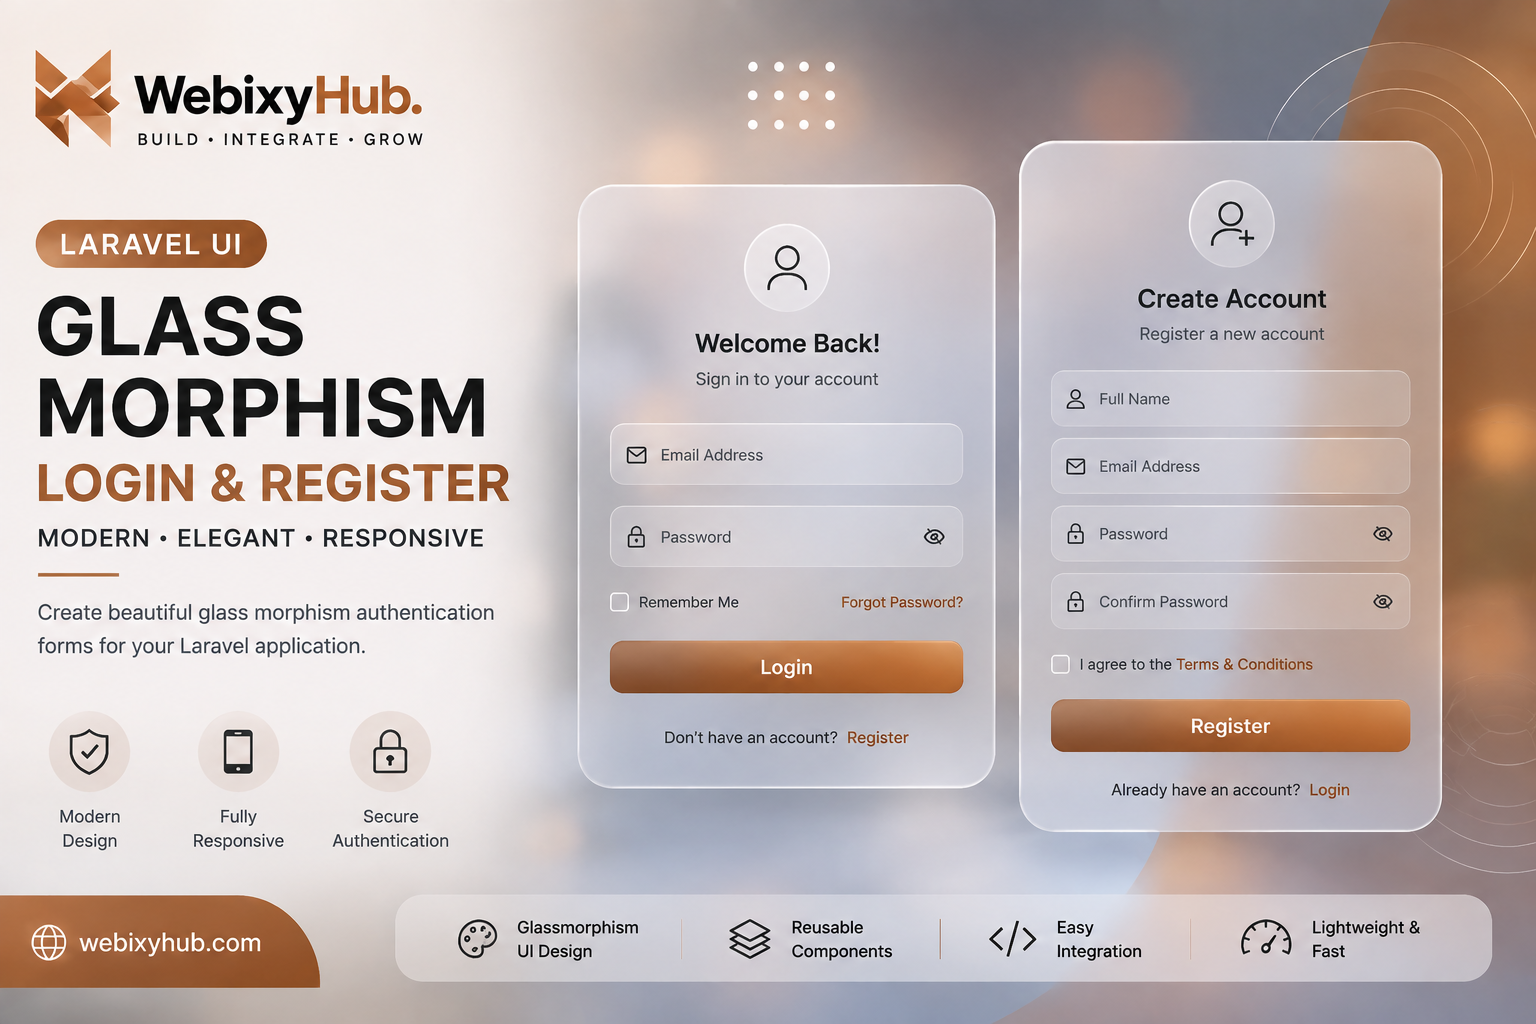
In this tutorial, we'll build a Laravel 13 glassmorphism login register form with a modern translucent card, blurred background elements, responsive layout, form validation, and secure Laravel authentication.
Instead of creating only a visual mockup, we'll connect the glassmorphism login form and glassmorphism register form to Laravel's actual authentication system.
By the end, you'll have a reusable modern Laravel login page suitable for SaaS products, dashboards, portfolios, admin panels, and other Laravel applications.
What We Are Building
Our Laravel authentication UI will include:
- Glass-style authentication card
- Background blur effects
- Modern Login form
- Modern Register form
- Responsive mobile layout
- Laravel validation errors
- Remember Me functionality
- Secure password handling
- Login and registration authentication
- Logout support
- Protected dashboard route
The result is a Laravel custom login page that looks modern without requiring a heavy frontend framework.
Step 1: Create the Laravel 13 Project
If you don't already have a Laravel project, create one:
composer create-project laravel/laravel glass-authEnter the project directory:
cd glass-authGenerate your application key if required:
php artisan key:generateStart Laravel:
php artisan serveYour application should normally be available locally at:
http://127.0.0.1:8000Step 2: Configure the Database
Open your .env file and configure your database.
For MySQL:
DB_CONNECTION=mysqlDB_HOST=127.0.0.1DB_PORT=3306DB_DATABASE=glass_authDB_USERNAME=rootDB_PASSWORD=Create the glass_auth database in MySQL and then run:
php artisan migrateLaravel will create the users table and other required database tables.
Common Error: Unknown Database
You may receive:
SQLSTATE[HY000] [1049] Unknown databaseThis means the database specified in .env doesn't exist.
Create it first:
CREATE DATABASE glass_auth;Then run:
php artisan migrateStep 3: Create the Authentication Controller
For this tutorial, we'll build the Laravel login form and Laravel register form ourselves so you can understand exactly how authentication works.
Run:
php artisan make:controller AuthControllerOpen:
app/Http/Controllers/AuthController.phpAdd:
<?phpnamespace App\Http\Controllers;use App\Models\User;use Illuminate\Http\Request;use Illuminate\Support\Facades\Auth;use Illuminate\Support\Facades\Hash;class AuthController extends Controller{ public function showLogin() { return view('auth.login'); } public function showRegister() { return view('auth.register'); } public function register(Request $request) { $validated = $request->validate([ 'name' => ['required', 'string', 'max:255'], 'email' => ['required', 'email', 'max:255', 'unique:users,email'], 'password' => ['required', 'confirmed', 'min:8'], ]); $user = User::create([ 'name' => $validated['name'], 'email' => $validated['email'], 'password' => Hash::make($validated['password']), ]); Auth::login($user); $request->session()->regenerate(); return redirect()->route('dashboard'); } public function login(Request $request) { $credentials = $request->validate([ 'email' => ['required', 'email'], 'password' => ['required'], ]); if (Auth::attempt($credentials, $request->boolean('remember'))) { $request->session()->regenerate(); return redirect()->intended(route('dashboard')); } return back() ->withErrors([ 'email' => 'The provided credentials do not match our records.', ]) ->onlyInput('email'); } public function logout(Request $request) { Auth::logout(); $request->session()->invalidate(); $request->session()->regenerateToken(); return redirect()->route('login'); }}Notice that we use:
Hash::make($validated['password'])Never save a user's password directly to your database.
Laravel hashes the password before storing it.
Step 4: Add Authentication Routes
Open:
routes/web.phpAdd:
<?phpuse App\Http\Controllers\AuthController;use Illuminate\Support\Facades\Route;Route::middleware('guest')->group(function () { Route::get('/login', [AuthController::class, 'showLogin']) ->name('login'); Route::post('/login', [AuthController::class, 'login']); Route::get('/register', [AuthController::class, 'showRegister']) ->name('register'); Route::post('/register', [AuthController::class, 'register']);});Route::middleware('auth')->group(function () { Route::get('/dashboard', function () { return view('dashboard'); })->name('dashboard'); Route::post('/logout', [AuthController::class, 'logout']) ->name('logout');});Using the guest middleware prevents authenticated users from unnecessarily accessing the Login and Register pages.
The auth middleware protects the dashboard from unauthenticated visitors.
Step 5: Create the Glassmorphism Authentication Layout
Now we'll start building the actual modern authentication UI.
Create:
resources/views/layouts/auth.blade.phpAdd:
<!DOCTYPE html><html lang="en"><head> <meta charset="UTF-8"> <meta name="viewport" content="width=device-width, initial-scale=1.0" > <title>@yield('title') | MyApp</title> @vite(['resources/css/app.css', 'resources/js/app.js'])</head><body class="auth-page"> <div class="background-shape shape-one"></div> <div class="background-shape shape-two"></div> <div class="background-shape shape-three"></div> <main class="auth-wrapper"> @yield('content') </main></body></html>The floating background shapes will create the blurred visual elements behind our glass card.
Step 6: Build the Glassmorphism Login Form
Create:
resources/views/auth/login.blade.phpAdd:
@extends('layouts.auth')@section('title', 'Login')@section('content')<div class="glass-card"> <div class="auth-heading"> <span class="auth-badge">WELCOME BACK</span> <h1>Sign in to your account</h1> <p> Enter your details to continue to your dashboard. </p> </div> <form method="POST" action="{{ route('login') }}"> @csrf <div class="form-group"> <label for="email">Email Address</label> <input id="email" type="email" name="email" value="{{ old('email') }}" placeholder="you@example.com" autocomplete="email" required autofocus > @error('email') <p class="error-message">{{ $message }}</p> @enderror </div> <div class="form-group"> <label for="password">Password</label> <input id="password" type="password" name="password" placeholder="Enter your password" autocomplete="current-password" required > @error('password') <p class="error-message">{{ $message }}</p> @enderror </div> <div class="form-options"> <label class="remember-me"> <input type="checkbox" name="remember"> <span>Remember me</span> </label> </div> <button type="submit" class="auth-button"> Sign In </button> </form> <div class="auth-footer"> Don't have an account? <a href="{{ route('register') }}"> Create account </a> </div></div>@endsectionWe now have a functional Laravel Blade authentication form, but it still needs the glassmorphism styling.
Step 7: Build the Glassmorphism Register Form
Create:
resources/views/auth/register.blade.phpAdd:
@extends('layouts.auth')@section('title', 'Register')@section('content')<div class="glass-card"> <div class="auth-heading"> <span class="auth-badge">GET STARTED</span> <h1>Create your account</h1> <p> Create an account and start exploring your dashboard. </p> </div> <form method="POST" action="{{ route('register') }}"> @csrf <div class="form-group"> <label for="name">Full Name</label> <input id="name" type="text" name="name" value="{{ old('name') }}" placeholder="Enter your name" autocomplete="name" required > @error('name') <p class="error-message">{{ $message }}</p> @enderror </div> <div class="form-group"> <label for="email">Email Address</label> <input id="email" type="email" name="email" value="{{ old('email') }}" placeholder="you@example.com" autocomplete="email" required > @error('email') <p class="error-message">{{ $message }}</p> @enderror </div> <div class="form-group"> <label for="password">Password</label> <input id="password" type="password" name="password" placeholder="Minimum 8 characters" autocomplete="new-password" required > @error('password') <p class="error-message">{{ $message }}</p> @enderror </div> <div class="form-group"> <label for="password_confirmation"> Confirm Password </label> <input id="password_confirmation" type="password" name="password_confirmation" placeholder="Repeat your password" autocomplete="new-password" required > </div> <button type="submit" class="auth-button"> Create Account </button> </form> <div class="auth-footer"> Already have an account? <a href="{{ route('login') }}"> Sign in </a> </div></div>@endsectionThe password_confirmation field works with Laravel's:
'password' => ['required', 'confirmed', 'min:8']validation rule.
Step 8: Add the Glassmorphism CSS
This is where our ordinary forms become a modern glassmorphism login form and registration interface.
Open:
resources/css/app.cssAdd:
@import 'tailwindcss';* { box-sizing: border-box;}body { margin: 0; font-family: Arial, sans-serif;}.auth-page { min-height: 100vh; position: relative; overflow: hidden; display: flex; align-items: center; justify-content: center; padding: 40px 20px; background: radial-gradient(circle at top left, #f4dcc8, transparent 35%), radial-gradient(circle at bottom right, #b76d3c, transparent 35%), linear-gradient(135deg, #fffaf6, #ead3c0);}.auth-wrapper { width: 100%; max-width: 460px; position: relative; z-index: 10;}.background-shape { position: absolute; border-radius: 50%; filter: blur(5px); opacity: 0.75;}.shape-one { width: 300px; height: 300px; background: #b86f3f; top: -100px; right: -60px;}.shape-two { width: 240px; height: 240px; background: #f4d8bd; bottom: -70px; left: -50px;}.shape-three { width: 150px; height: 150px; background: #ffffff; top: 35%; left: 10%; opacity: 0.35;}.glass-card { width: 100%; padding: 40px; background: rgba(255, 255, 255, 0.46); border: 1px solid rgba(255, 255, 255, 0.7); border-radius: 26px; backdrop-filter: blur(22px); -webkit-backdrop-filter: blur(22px); box-shadow: 0 25px 60px rgba(76, 42, 22, 0.15), inset 0 1px 0 rgba(255, 255, 255, 0.6);}.auth-heading { text-align: center; margin-bottom: 30px;}.auth-badge { display: inline-block; padding: 7px 13px; border-radius: 999px; background: rgba(169, 98, 53, 0.12); color: #9b5d36; font-size: 11px; font-weight: 700; letter-spacing: 1.4px; margin-bottom: 14px;}.auth-heading h1 { margin: 0; color: #251b16; font-size: 30px; line-height: 1.2;}.auth-heading p { margin: 10px 0 0; color: #77685f; font-size: 14px; line-height: 1.6;}.form-group { margin-bottom: 18px;}.form-group label { display: block; margin-bottom: 8px; color: #382a22; font-size: 13px; font-weight: 600;}.form-group input { width: 100%; padding: 14px 16px; border: 1px solid rgba(107, 78, 61, 0.16); border-radius: 12px; outline: none; background: rgba(255, 255, 255, 0.55); color: #251b16; font-size: 14px; transition: 0.2s ease;}.form-group input::placeholder { color: #aa9a90;}.form-group input:focus { border-color: #a8673d; background: rgba(255, 255, 255, 0.72); box-shadow: 0 0 0 4px rgba(168, 103, 61, 0.10);}.form-options { display: flex; justify-content: space-between; align-items: center; margin: 4px 0 22px;}.remember-me { display: flex; align-items: center; gap: 8px; color: #66574e; font-size: 13px;}.auth-button { width: 100%; border: none; border-radius: 12px; padding: 15px 20px; cursor: pointer; background: linear-gradient(135deg, #9d5c34, #c17a49); color: white; font-size: 14px; font-weight: 700; box-shadow: 0 12px 30px rgba(157, 92, 52, 0.22); transition: transform 0.2s ease, box-shadow 0.2s ease;}.auth-button:hover { transform: translateY(-2px); box-shadow: 0 16px 35px rgba(157, 92, 52, 0.28);}.auth-footer { margin-top: 24px; text-align: center; color: #77685f; font-size: 13px;}.auth-footer a { color: #995a35; font-weight: 700; text-decoration: none;}.auth-footer a:hover { text-decoration: underline;}.error-message { margin: 7px 0 0; color: #c04444; font-size: 12px; font-weight: 500;}@media (max-width: 600px) { .auth-page { padding: 24px 16px; } .glass-card { padding: 30px 22px; border-radius: 20px; } .auth-heading h1 { font-size: 25px; } .shape-one { width: 220px; height: 220px; } .shape-two { width: 190px; height: 190px; }}The important property behind the glassmorphism authentication UI is:
backdrop-filter: blur(22px);Combined with a semi-transparent background:
background: rgba(255, 255, 255, 0.46);this creates the frosted-glass appearance.
Step 9: Create a Simple Dashboard
Create:
resources/views/dashboard.blade.phpAdd:
<!DOCTYPE html><html lang="en"><head> <meta charset="UTF-8"> <meta name="viewport" content="width=device-width, initial-scale=1.0" > <title>Dashboard</title> @vite(['resources/css/app.css', 'resources/js/app.js'])</head><body> <div style="padding: 40px;"> <h1> Welcome, {{ auth()->user()->name }} </h1> <p> You are successfully authenticated. </p> <form method="POST" action="{{ route('logout') }}"> @csrf <button type="submit"> Logout </button> </form> </div></body></html>Now visiting /dashboard without authentication should redirect the visitor to Login.
Step 10: Build the Frontend Assets
Run:
npm installThen during development:
npm run devOr create production assets with:
npm run buildNow visit:
http://127.0.0.1:8000/registerCreate an account.
After successful registration, Laravel should authenticate the user and redirect to:
/dashboardYou can then logout and test:
/loginYour Laravel custom registration form and login system are now connected to real authentication.
Common Errors and How to Fix Them
Even a simple Laravel authentication tutorial can run into configuration problems. Here are some of the most common ones.
Error 1: Vite Manifest Not Found
You may see:
Vite manifest not foundInstall dependencies:
npm installThen run:
npm run devFor a production build:
npm run buildError 2: CSRF Token Mismatch / 419 Page Expired
Laravel forms require CSRF protection.
Make sure both Login and Register forms contain:
@csrfWithout this directive, Laravel can reject the request with a 419 Page Expired response.
Error 3: Route Login Not Defined
You might encounter:
Route [login] not definedEnsure your login route has:
->name('login');For example:
Route::get('/login', [AuthController::class, 'showLogin']) ->name('login');The auth middleware expects a login route when redirecting unauthenticated users.
Error 4: Password Confirmation Fails
If Laravel keeps saying that the password confirmation does not match, check the confirmation input name.
It must be:
name="password_confirmation"because Laravel's:
'confirmed'validation rule looks for {field}_confirmation.
Error 5: User Data Is Not Saving
Check your User model:
app/Models/User.phpMake sure the required attributes can be mass assigned.
For example:
protected $fillable = [ 'name', 'email', 'password',];Then retry registration.
Error 6: CSS Changes Are Not Appearing
If you've modified app.css but the modern Laravel login page still shows the old styling, rebuild your frontend assets.
During development:
npm run devOr:
npm run buildYou can also clear Laravel's caches:
php artisan optimize:clearThen refresh your browser.
Security Improvements for Production
A beautiful Laravel login form isn't useful if authentication isn't secure.
The example already uses Laravel's password hashing and session authentication, but a production application can go further.
Consider adding:
- Login rate limiting
- Email verification
- Password reset
- Stronger password requirements
- Two-factor authentication
- Secure production cookies
- HTTPS
- Account lockout or suspicious-login monitoring
Also never store passwords using plain text:
'password' => $request->passwordUse Laravel hashing:
'password' => Hash::make($validated['password'])Why Glassmorphism Works Well for Authentication Pages
Glassmorphism can make a Laravel authentication UI feel premium without filling the screen with unnecessary visual elements.
The combination of transparency, background blur, subtle borders, rounded corners, and restrained shadows creates depth while keeping the Login and Register fields easy to understand.
The key is moderation.
Too much blur, transparency, animation, or low-contrast text can hurt usability. Your responsive Laravel login page should still prioritize readable labels, visible focus states, clear validation errors, and accessible form controls.
Final Result
You've now built a complete Laravel 13 glassmorphism login register form with real authentication rather than a static UI demo.
The project includes a glassmorphism login form, glassmorphism register form, responsive styling, Laravel validation, secure password hashing, protected routes, sessions, and logout functionality.
You can use this approach as the foundation for a SaaS dashboard, portfolio, admin system, customer portal, or any application that needs a polished modern authentication UI.
Most importantly, you now control the entire Laravel custom login page and Laravel custom registration form, making it easy to adapt the design to your own brand.